
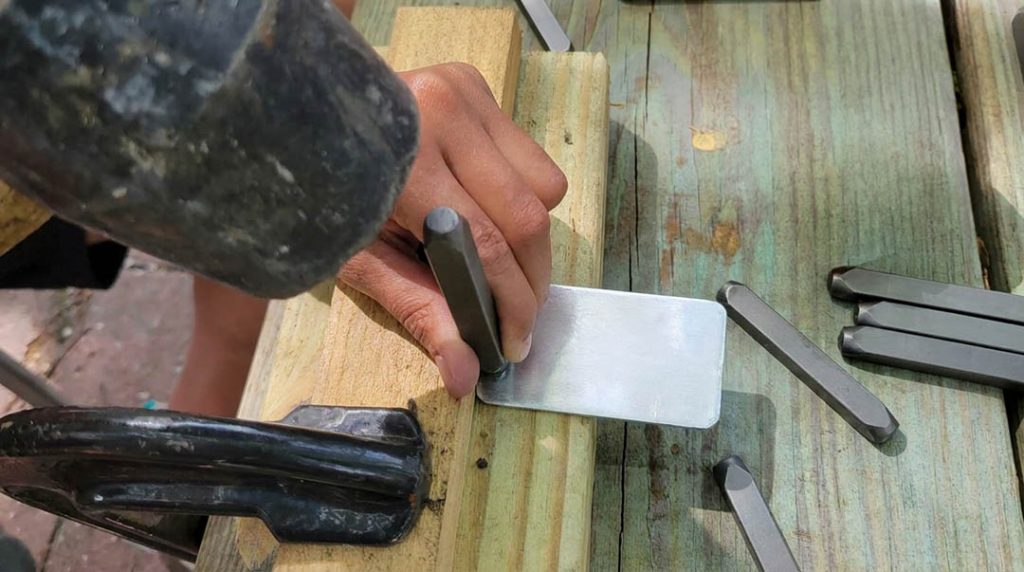
Ordering a custom stamp without knowing if your material will take a clean impression is a gamble you don’t need to take. A few simple checks on a scrap piece before you commit tell you almost everything you need to know: whether the hand stamp will mark cleanly, how much force to use, and whether your material needs a different approach. This guide walks through exactly how to test it yourself. For a broader look at what materials generally work well, see our materials guide for metal, wood, and plastic.
Testing takes a few minutes and a scrap piece of the same material you’re planning to mark. It’s the single best way to avoid a ruined part or a stamp that doesn’t perform the way you expected.
Why You Should Test Before You Order
Every material responds differently to impact. Two pieces of what looks like the same material, say two plastics or two hardwoods, can behave completely differently under a stamp depending on thickness, hardness, and internal structure. Testing on scrap first means you find out before you’ve committed a finished part, not after.
This matters most when you’re working with a material you haven’t stamped before, ordering in volume where a bad batch is costly, or working with anything borderline: thin plastic, softwood, or a metal you’re unsure about.
Step 1: Get a Scrap Sample of the Real Material
Start with an offcut, test piece, or sample of the exact material and thickness you’ll be marking in production. Testing on a different grade of steel, a different plastic resin, or a thicker piece of wood than your actual part won’t tell you much. The closer your test sample matches your finished piece, the more reliable your results.
If you don’t have scrap on hand, a small sample ordered along with your material or cut from an unused edge of the actual stock works just as well.
Step 2: Check Relative Hardness
Before you strike anything, get a rough sense of how hard your material is. Two simple checks:
The scratch test. Try scratching the surface with a metal file or the edge of a hardened tool. If it scratches easily, you’re working with a softer material that will take an impression with less force. If it resists scratching, expect to need more force, and be more cautious about cracking on brittle materials like some plastics.
The flex test. For wood and plastic, flex a corner of the sample by hand. Materials that flex significantly need to be backed with a firm, flat surface during stamping so they don’t absorb the impact by bending instead of marking.
Step 3: Confirm Adequate Thickness
Thin material, whether it’s sheet metal, thin plastic, or a thin wood veneer, has less mass to absorb the stamp’s impact. As a rule, your material should be thick enough that the impression doesn’t come through or visibly deform the opposite side. If your test piece flexes, dents through, or cracks near the edges, your production material likely needs backing support or a different marking approach.
Step 4: Start with a Light Test Strike
Position the stamp on your scrap piece and start with a lighter strike than you think you need. It’s much easier to add more force on a second strike than to recover from a mark that’s too deep, cracked the material, or blown through a thin section.
For hand stamping with a hammer, a moderate, controlled strike is usually enough to start. For an arbor press, begin with light pressure and increase gradually until you see a full, clean impression.
Step 5: Read the Test Mark
Once you’ve made a test impression, look closely at the result:
A good test mark has clean, well-defined edges, consistent depth across all characters, and no cracking, chipping, or bulging around the impression.
A mark that needs adjustment shows blurred or doubled edges (too much force, or the material shifted during the strike), shallow or incomplete characters (not enough force), or cracking, chipping, or splitting near the edges (the material is too brittle or thin for the force applied).
If your first test isn’t clean, adjust one variable at a time: force, backing support, or strike angle, and test again before moving to your actual part.
What to Do If Your Test Fails
If you can’t get a clean impression after a few adjusted attempts, that’s useful information, not a dead end. A few options:
Reduce character size. Smaller characters need less total force to impress cleanly, which helps on brittle or thin materials.
Add backing support. For thin or flexible material, stamping against a firm, flat surface behind the workpiece often solves the problem entirely.
Reconsider the stamp specification. A different stamp hardness or face design may be better suited to your material.
Consider a different marking method. Some materials, particularly very thin sheet metal, hardened tool steel, or highly brittle plastics, are better suited to machine stamping or another marking method entirely rather than hand stamping.
Frequently Asked Questions About Testing Hand Stamp Compatibility
Can I test on the actual part instead of scrap?
It’s better to use scrap or a sample piece whenever possible. Testing on your actual part risks damaging a finished piece if the first strike isn’t right. Scrap testing lets you fine-tune force and technique without any risk to production material.
What if I don’t have any scrap material to test with?
A small sample cut from an unused edge or corner of your stock works well. If that’s not an option, ordering a small test quantity of your material before committing to a full production run is worth the extra step.
How many test strikes should I do before trusting the result?
Two or three consistent, clean impressions in a row is a good sign you’ve found the right force and technique. One good strike could be luck; repeatability is what confirms it.
Does testing tell me what character size to use?
Indirectly, yes. If your test marks blur or lose detail at a given character size, that’s a sign to size up. If small text comes through clean, you have more flexibility in your design.
Should I test with the exact stamp I’m ordering, or is a similar one fine?
A similar stamp in the same general hardness range gives you a good read on force and material behavior, but final confirmation should happen with your actual stamp once it arrives, especially for tight tolerances or fine detail.
Test First, Order With Confidence
A few minutes of testing on scrap material tells you more than any spec sheet can. Once you know how your material responds, whether it needs a lighter touch, backing support, or a specific character size, you’re ready to order a custom hand stamp built to match exactly what you’re marking.
